Do you want to know how to set up a DNS for your WordPress site, but you don’t know where to start? DNS is like a directory for the internet, and it helps you to find your website.
Setting up a WordPress DNS can be a daunting task for many website owners, but don’t worry, this ultimate guide will show you how to set up WordPress DNS for beginners.
Post Contents
What is WordPress DNS?
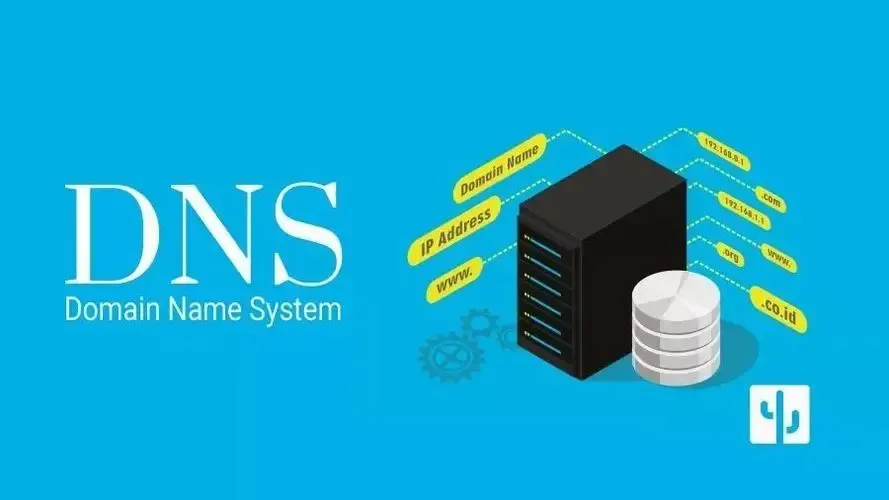
DNS, or Domain Name System, allows you to connect to websites by converting human-readable domain names into IP addresses. When you type a URL into your browser (for example, wbeginner.com), DNS translates that URL into a unique ID for the server where the website is stored (for example, 192.124. 249.166) and directs your device in the correct direction.
These domain names and their corresponding IP addresses are known as DNS records. When you’re running a WordPress website, you need to understand how DNS records work and how to configure them correctly. Let’s take a look at DNS and what happens in the background when visiting a website.
How Does DNS Work?
DNS can be thought of as a phone book for the internet, where you can find directions to all of the websites on the internet. To understand how DNS works, let’s say you type ” www. wpbeginner.com” into your browser and press the Enter button. A quick search will be done to see if you’ve visited the site before.
If a DNS record is found in your computer’s DNS cache, you’ll be redirected directly to the server. If you don’t see a DNS record, a query will be sent to the DNS server. The DNS server is typically your Internet Service Provider (ISP) server, or your domain host resolving nameserver.
If the record isn’t on your resolving nameserver, it’ll be forwarded to the ‘root nameservers’, which are servers all over the world that store DNS data. Once the DNS record is in the ‘root’ nameservers, your computer will cache it.
They’ll then find the record, and a connection will be established between the server and your site. You’ll now be able to view the site on your screen. To get a better understanding of how DNS works, check out the image below.

To learn more, you can see our guide on Demystifying Domain Names: A Beginner’s Guide.
Configuring WordPress DNS Settings
Now that you have a basic understanding of DNS and how DNS works, let’s take a closer look at how to configure DNS for your WordPress site.
DNS settings are typically managed by your domain registrars and WordPress hosting companies. You can use them to manage DNS records and edit various types of DNS records.
Keep in mind that the settings may differ depending on your hosting provider. For the purpose of this post, we are going to use Bluehost.
How to configure DNS for WordPress? To configure DNS for WordPress, you will first need to log into your Bluehost account. Once logged in, go to the Domains menu on the left.

Next, locate your site and click on Settings.
Bluehost will display various domain settings. Scroll down and select Advanced Tools.

From here, you will see that the Advanced Tools section will expand and display various options.
From here, Bluehost will display your domain nameservers and other records.
To manage DNS records, click the ‘Manage’ button before Advanced DNS Records.

After that, Bluehost will warn you that you should only change the DNS records for more advanced users.
Click the Continue button.

On the following screen, you’ll see a few different types of DNS entries.
Now you can edit these entries and set up your WordPress DNS.

An Address Record or A Record is a record that points to an IP address for a domain or subdomain.
Canonical Name Record (CNAME) is another record that points to a domain name.
Mail Exchanger (MX) Record is the main exchanger that directs emails to a server that processes emails for your domain
TXT Records are records that provide descriptive domain information to other services such as Google Search Console in text format.
How to Change Domain Nameservers
Domain Nameservers (DNs) are servers that store all DNS records associated with your domain name. The purpose of a DNS server is to provide DNS information to anyone who requests it.
The WordPress hosting service or domain name registrar will provide you with a list of nameservers for your website. Each DNS server will have an address and can store DNS records for multiple websites.

Please keep in mind that your hosting provider and domain registration service may have different nameservers. For instance, if you use Bluehost, your nameservers may look as follows:
Most of the time, there are two main reasons why you need to change the nameservers:
You need to add a Web Application Firewall (WAF) such as Sucuri, Cloudflare, etc.
You are moving your WordPress site to a different hosting provider.Your domain is pointing to the new hosting location.
To implement a firewall on your site using a WordPress WAF plugin, you will also need to change your nameservers. This is because WAF plugins block cyberattacks at the DNS level.
How to properly set up redirects in WordPress
Redirects are an important component of WordPress DNS setup. Redirects do not happen at DNS level, but many DNS registrars allow you to configure redirects when you configure your site’s DNS settings. For instance, when you migrate a website or redirect a URL to a different link, your DNS records must also be updated.
If you do the redirection manually, there are many errors that can occur. For example, your WordPress site will redirect to your old domain after migration. DNS issues are one of the most common causes of this. If your DNS records are not updated or your DNS server is not responding, users will not be able to see the new site URL.
You can avoid this issue by using a powerful WordPress SEO plugin like AIOSEO. AIOSEO provides a powerful Redirection Manager that allows you to configure redirection in WordPress and do full website redirection.

How to Change MX Records for WordPress Site
The MX (Mail Exchange) records let the internet servers know where to send emails coming from and going to your website’s domain name. To create a business email address with your domain name, you’ll need to change your MX records. For example, if you’re using Google Workspace and your domain name is “name.” You’ll need to update your MX records so that all your emails are routed through Gmail.
If you’re using Hostinger, you’ll also need to change or add your MX records if you’re sending WordPress emails through an SMTP provider. SMTPs improve email delivery and ensure your emails don’t end up as spam.
To update or add an MX record, you’ll first need to log into your WordPress Hosting Provider or Domain Registrar.
In your Domains section, go to “DNS/ Nameservers” and select the record type “MX”.
Then, go to “Manage DNS records” and select the new record.

How to Clear DNS Cache from Your Computer
Have you ever received a pop-up message asking you to flush your computer’s DNS cache?
What is a DNS cache?
It’s basically an address book that holds all the IP addresses from each website you’ve visited.
However, DNS cache information can become outdated over time and cause multiple DNS-related problems on your WordPress website.
Flush or clear the DNS cache can help resolve many of these issues.
It allows your computer to collect new DNS information and update your cache.
How To Flush DNS Cache? The steps for flushing your DNS cache vary depending on the operating system you’re using.
For Windows, you can open the command prompt tool in the Windows operating system. For Mac users, you can use the Terminal app.
ipconfig /flushdns
WordPress DNS Troubleshooting
When you’re managing a WordPress site, you’re bound to run into various DNS-related problems.
Let’s take a deeper dive into some of the DNS-related errors you’ll encounter and how fast you can resolve them.
1. DNS Server Not Responding
One of the most common WordPress issues encountered by users is the DNS server error.

This error indicates that your browser can’t connect to the servers that host the website. It happens when the DNS provider isn’t available, there’s a firewall problem, or there’s an internet connectivity issue.
How to fix DNS server not responding? Check your internet connection and make sure it’s up and running. You can also try shutting down your firewall or antivirus on your computer.
2. DNS_PROBE_FINISHED_NXDOMAIN Error
A DNS PROBE() or DNS FINISHED() error is an error message displayed by Google Chrome when the browser is unable to find the website you are trying to view.

The DNS error happens when the DNS server is unable to locate or connect to the IP address of the website. The browser then assumes that the website does not exist.
This error is also found in other browsers, such as Mozilla Firefox and Microsoft Edge, as well as Safari.
The DNS error will be different in each of these browsers.
How to fix this error?
First, you can clear your browser cache and the DNS cache on your computer.
You can also use Google’s public DNS servers, and check your computer’s host files.
3. ERR_CONNECTION_RESET Error
Another problem you may encounter is the error “ERR_CONNATION_RESET” in Google Chrome.
Most of the time, this error indicates that your WordPress website is up and running, but your browser can’t access it.

While this is not a DNS issue, it can happen if you’ve recently migrated your domain to a different hosting platform or changed your domain name. One way to resolve this is to flush your DNS cache and replace it with a new DNS cache, such as Google Public DNS.
4. WordPress Redirecting to Old Domain After Migration
If you have recently moved your WordPress site to a different domain name and redirection is not working correctly, then users may be directed back to your old domain. This error usually happens when the site and home URLs are different in your WordPress database.
The reason for this is that the DNS server is not responding, or DNS records have not been updated. You can fix this by checking your WordPress settings first. Then, you can clear your DNS cache so that it is updated with the most up-to-date DNS information available.
Check out our guide on how to fix WordPress redirection to your old domain after migrating your site.
Thanks for reading this article! We hope you found it useful and helpful.